Build Your Own Weatherproof Camera Housing
I recently purchased a wireless internet webcam. Of course, I really wanted to install it outside, but the weatherproof cameras were quite a bit more expensive, and the commercial housings that are available are all made of aluminum. Remember, this is a wireless camera - an aluminum housing would pretty effectively kill a 2.4GHz signal unless I purchased an external antenna. So, I decided to build my own weatherproof camera housing.
I needed to use a wireless camera (web-cam) because my router is in the house and, as you can see from the photos, the camera is mounted on the detached garage. Running an Ethernet wire to the camera would have been a real pain! That, and when I bought this house, I made a conscious decision NOT to run Ethernet wires all over the place (best thing I ever did), and I already knew from using my laptop in the garage that signal strength would not be a problem.
First, I purchased a length of 3” PVC drain pipe from the local hardware store (my camera fits perfectly inside - yours may require a different size. They come in larger and smaller diameters.) A 5’ piece cost me around $10. I also picked up a PVC end cap and a small can of PVC glue. Next I obtained a 72mm UV filter to match the inside diameter of the drainpipe for the camera lens end. I sacrificed an old outdoor extension cord for the disconnect and fed it through a weathertight Romex connector on the bottom of the tube. A short length of perforated pipe strap serves to clamp it to the side of my garage. Note: this is the reason I need a wireless webcam - I have a detached garage and my internet router is in the house.
I cut the PVC to approximately 14” (make yours shorter or longer to accommodate your camera - don’t forget to leave room for the “wall-wart” and the antenna). I made a “balogna” cut in one end to serve as a sun-shade (see photos). My camera has a threaded fitting in it for a tripod so I used a matching bolt to mount it inside the PVC tube (you can see it in some of the photos). Glue the 72mm UV filter in place, but don’t do it until you make sure the lens is focused properly (I put a couple dabs of silicon sealant on the focus ring to prevent it from moving). I used clear silicone glue to make sure it’s waterproof. Note the floodlights just below the camera for night-time illumination (motion-detecting floods will come next).
So far, the housing has been great! I recently took it down and inspected inside, and it was clean and dry. The drainpipe camera housing is doing it’s job flawlessly!
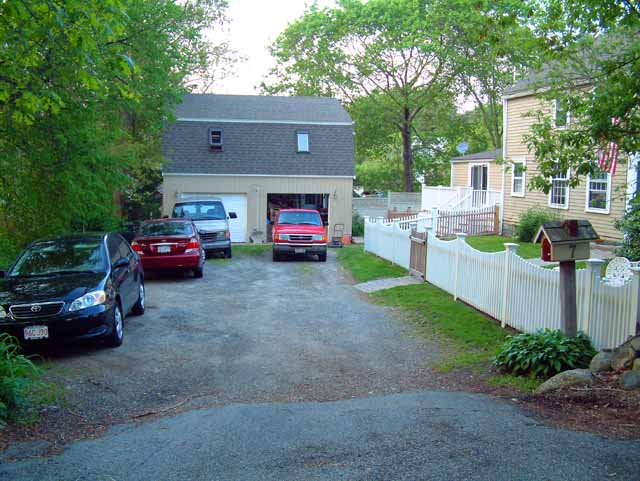
Can you find the hidden surveillance camera?
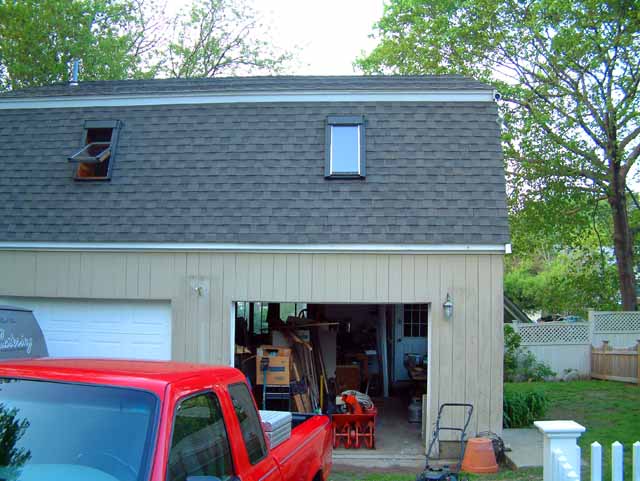
Here’s a closer look. See it yet?
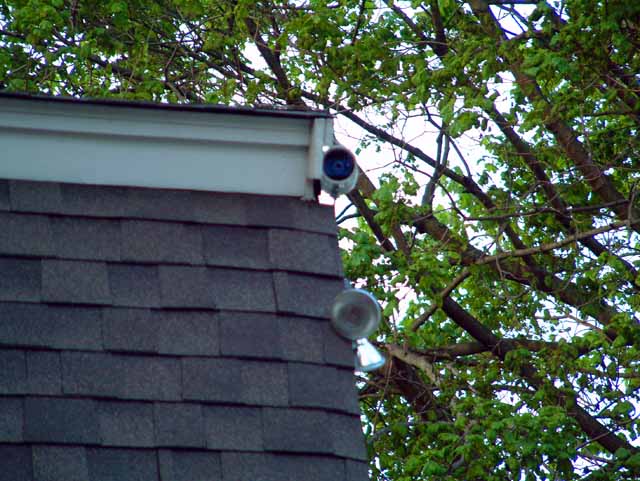
Wait! Are there 2 of ’em?
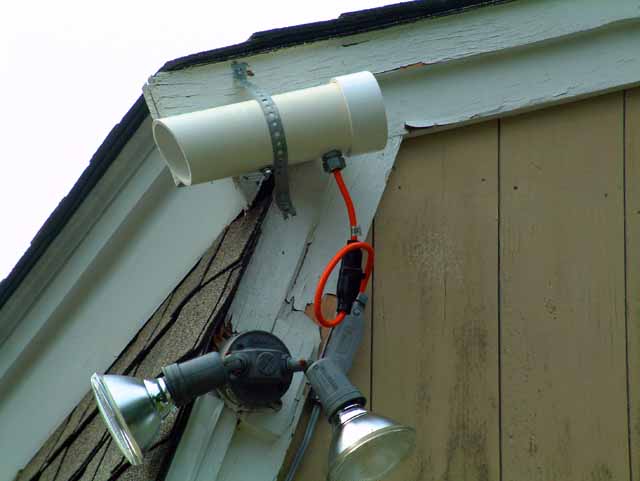
There it is!
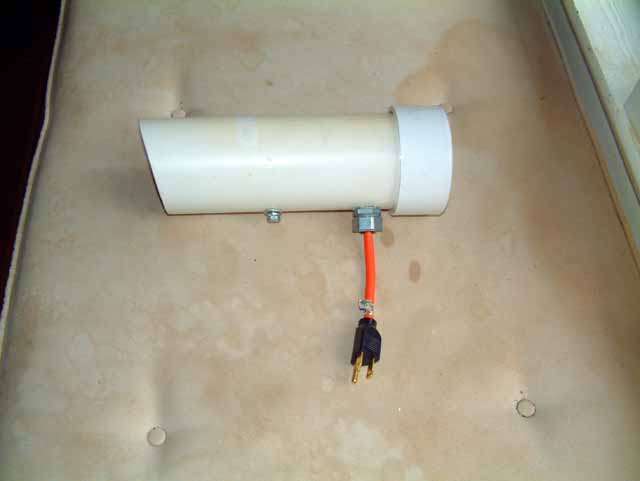
Camera housing is made of 3” PVC with PVC endcap. The front cover is actually an inexpensive 76mm UV filter glued in place with waterproof silicon. I originally tried using a piece of Plexiglass but it really wasn’t good enough for optical use.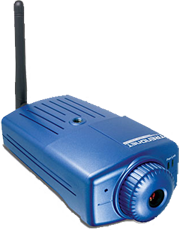 The A.C. disconnect
  allows me to easily remove the camera for maintenance and the PVC endcap is tight enough that it doesn’t need to be glued. That also makes for easier maintenance, should it ever be required. A quick wrap with vinyl electrician’s tape to seal out moisture completes the job.
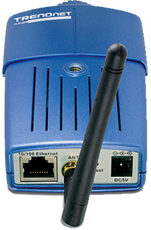
The web-camera I used is a TRENDnet Model TV-IP100W. It can produce a maximum resolution of 640 x 480 pixels, which is how I have mine set. Because I use it wirelessly and I have my router secured, I needed a web-cam that could use an encrypted connection - this one easily handles 64/128 WEP, and WPA-PSK encryption. Here’s some photos of it. Note the mounting holes - there is one on the top and another in the bottom. In the right photo you can see the Ethernet connector. It is used for initial setup (in case you wish to change the factory defaults). The camera comes with an app that allows you to record motion files on your PC. The recording can be motion-activated.